So you’ve got your nice shiny new site all ready on the staging site and you need to make it live! This is a step that is fraught with peril and danger!!!! Only kidding, if you do things properly it’s pretty straight forward.
My preferred tool for deploying a WordPress site is a plugin called Duplicator which you can find here https://wordpress.org/plugins/duplicator/ or by typing in “Duplicator” to your add plugin screen in the WordPress admin. So below is a quick guide where I’ll look at deploying over an existing site and also deploying to a new domain, for the purpose of the example deploying staging.thesite.com to thesite.com. The example below is also targeted at two mainly static sites, if you have a more dynamic site, housing lots of comments etc then you’ll need to consider additional steps for data migration and when to put up holding pages on the live site etc. However most of the steps here can still be applied just with a little more caution and forward planning.
Preparing the Staging site
First things first then, get the staging site ready to move. Make sure everyone working on it knows that the site is now being moved so they stop making changes as any changes now stand a good chance of getting lost in the move.
Is it up to date?
So time to make sure the site is up to date. No point moving it and then applying a load of WordPress and plugin updates, best get them all done now and make sure everything is ok. Also make sure you have all your appropriate plugins installed for going live, Yoast, WordFence, Caching plugin, image optimisation.
Analytics
It might be a good point here to make a note of anything like analytics code so you can easily add them to the new site without having to go and dig out your account details.
Duplicating the site
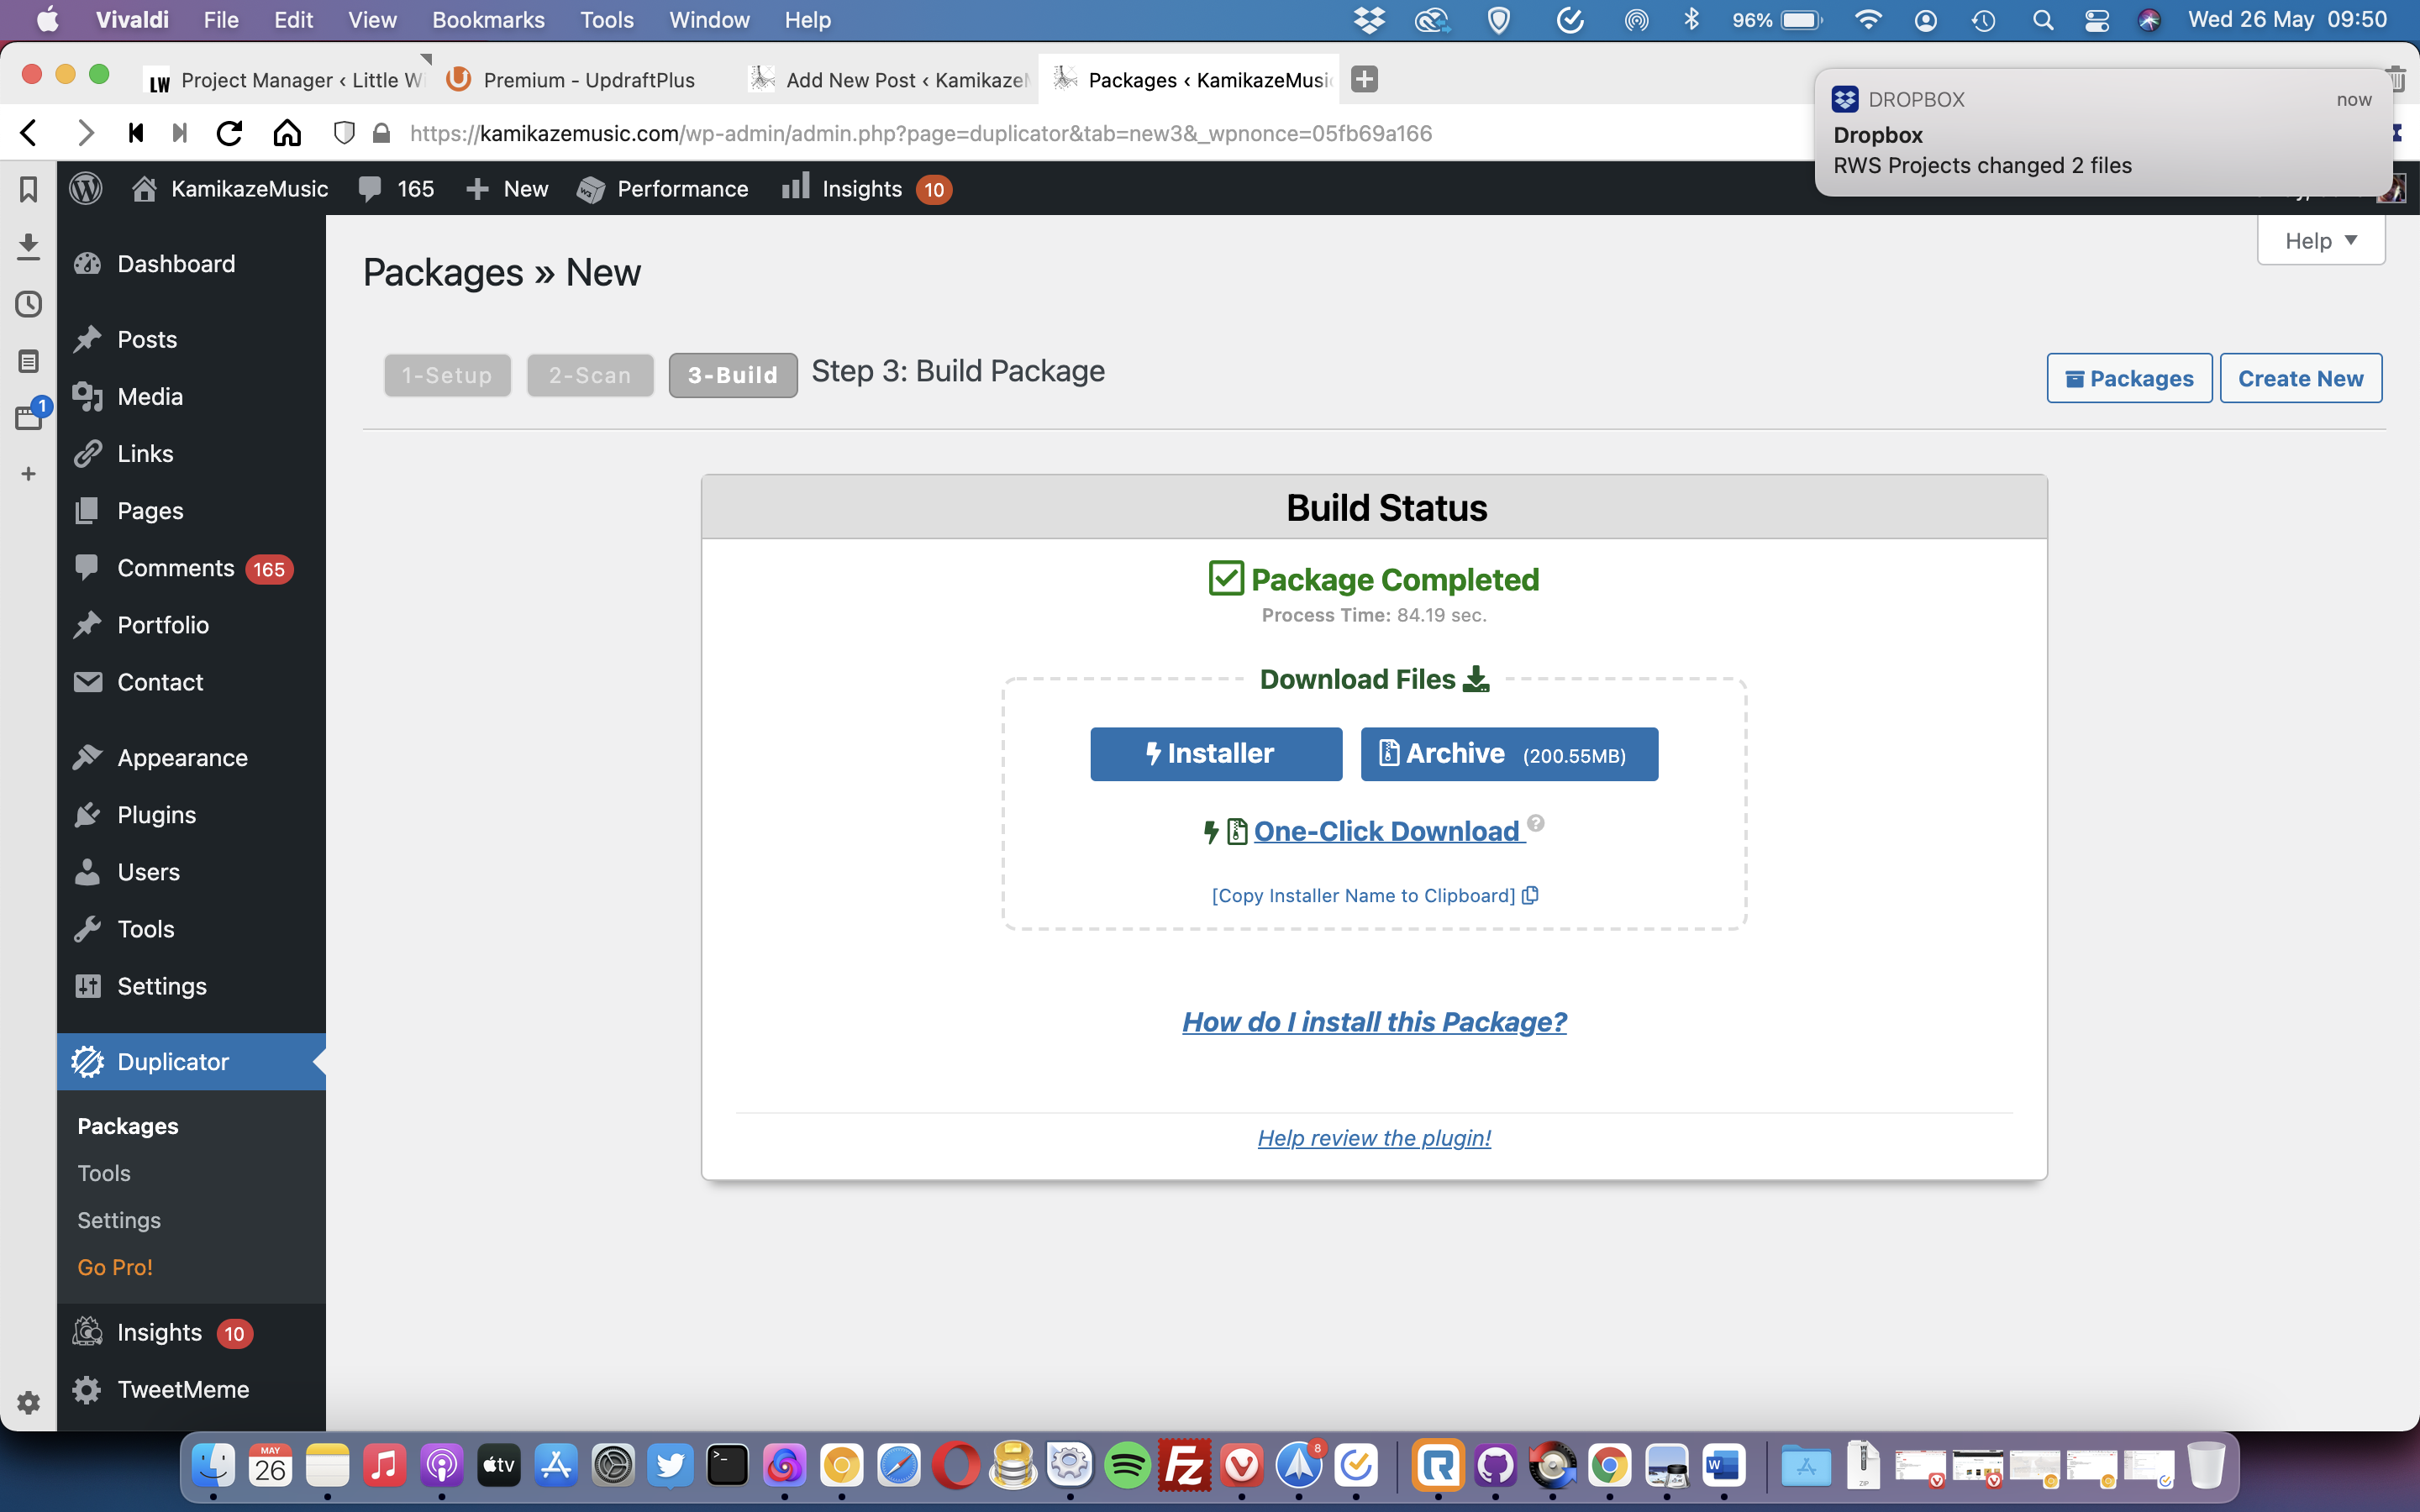
Now we run the duplicator plugin, obviously if it’s not already there on the staging site then install it, head to the Duplicator menu item on the main WordPress admin menu. You should see a button labeled “Create New” so click on that.

Now head through the step by step process until you get a package at the end, download both the zip file and the installer.php file and keep them safe for later on.
My site is too big!
One issue you can run into here, especially with media heavy sites, is the site being too big for WordPress Duplicator. There are ways to increase the allowable limits, notably with Duplicator Pro. However my personal choice is the let duplicator handle the database and manually move the site files. In this case when you first click “Create new” for the package, open up the Archive tab and select “archive the database only”. You’ll still get a package out at the end but you’ll need to back up everything in the staging sites’s route directory ready to move. So head in via FTP or a hosting file manager and backup all those files ready to upload to the new site later.
Preparing the new site
So the staging site is all ready to go, we now need to get ready for uploading to the destination. There will be a couple of different permutations here mainly
- Uploading over a new site
- Uploading to an entirely new domain (maybe with something like a holding page in place)
- Moving to a new server
So we’ll look at the first two first as they’re roughly similar and then discuss doing the last one further down the line.
Backup Backup Backup
First things first, backup what’s already there, even if it’s just a holding page. If it’s a WordPress site you can use duplicator like above to do so. Then keep those backups handy, if anything goes wrong (it shouldn’t!) you’ll want to be able to roll back easily if it does.
Setup the FTP and database
So you’ve got everything backed up, good job. You now need to upload your duplicator package and get ready to install it. So get your FTP and database details ready. If you’ve got an existing site setup then you can use the existing details, if it’s WordPress you can grab the database details from the wp-config.php file. Bear in mind using the existing details will overwrite your current live site data – hence the backup we’ve just done. If you haven’t got an existing setup you need to go into your hosting and create a database, a database user and assign a password and also create an FTP user.
Upload the Package
Next step is to upload the package / files. If your site was small enough then you just have installer.php and a zip file to upload, so go ahead and pop those into the main site folder on your server. If you’ve had to backup your files separately then I recommend clearing out the site’s main folder, uploading all your files backed up from your staging site and then adding the installer.php and zip file from Duplicator. You’ll get a few errors on the front end as stuff uploads but we’re nearly there.
Unpack it all and go live!
Now you visit the installer.php to go live! Navigate to thesite.com/installer.php and you’ll get a step through guide to deploy the site. Have your database credentials handy as you’ll need to pop these in during the process as well.
If you’re overwriting an existing site then Duplicator will install the files over the top of the current site. If you’ve copied the files separately then Duplicator will simply set up the database and work with the files you’ve uploaded. Once it’s all done though you’ll be pointed to the login page, use the same credentials as you did on the dev site to login and Duplicator will do a cleanup and remove all the install files from your domain.
It’s alive
So that’s it you’re live, at this point you still have a few tasks to do. Have a look around for a start and check everything is working, test contact forms etc. Make sure you have all the relevant plugins such as caching, firewall etc now turned on and of course make sure you’ve unticked the “Discourage search engines from indexing this site” option in Settings > Reading. Also add back in the analytics code and similar if you need to.
I’d recommend taking another backup of the site now as your day 0 backup. But well done you’ve deployed a new WordPress site.
Moving to a new server
So I mentioned three options above for deploying to a live site, the third one being moving the site to a new server in the process. I have a preferred method for doing this which requires a little more technical involvement. Specifically this scenario is referring to a move from a thissite.com from server A to server B as part of going live.
On the new server B you do all the steps as above, setting up the domain on the server as you would normally and uploading all the files, however when you visit thesite.com/installer.php you aren’t going to get very far as the DNS will still point you to server A. This is where you need to delve into your local machine settings for a bit of help. Your computer contains a “hosts” file which tells it where to look for a certain site. In this case you need to edit your hosts file to tell it to find thesite.com at the IP address of server A instead of server B. I won’t put a detailed description of changing your hosts file in here as there are plenty of articles about that (check out this one https://www.hostgator.com/help/article/how-do-i-change-my-hosts-file). But the process is to adjust your hosts file and when you are now pointing at the new server B you can run through the steps as above with no problem. Once you’re done and happy, reset your hosts file back and then update the domain DNS to point the site address at the new server B (either adjusting an A record or changing the nameservers entirely) As the DNS changes propagate the site should gradually change to pointing at the new server for users over the next 48 hours
Managing live site data during a move
One other thing mentioned at the start is dealing with a site that collects data such as comments on an ongoing basis. Again I won’t go into an exhaustive process here but my preferred method is roughly
- Get the dev site ready
- Put the live site into maintenance mode and back it up
- Migrate all the new data such as comments, posts etc to the dev
- Check the dev site is all correct and working and then follow the steps as above to deploy the site to a live setup
I’ll say it again “Backup, backup, backup”
Once you’ve done a few sites this process becomes quite familiar, they’ll all throw up little tweaks, license clashes for plugins and things like that. But one thing to remember is every step of way to take backups. As long as you have a quickly deployable backup of any stage of the process you can rescue any issues.


